Adding a Person |
Introduction
|
This QRG shares several methods for adding a Person into Stafftrak.
|

|
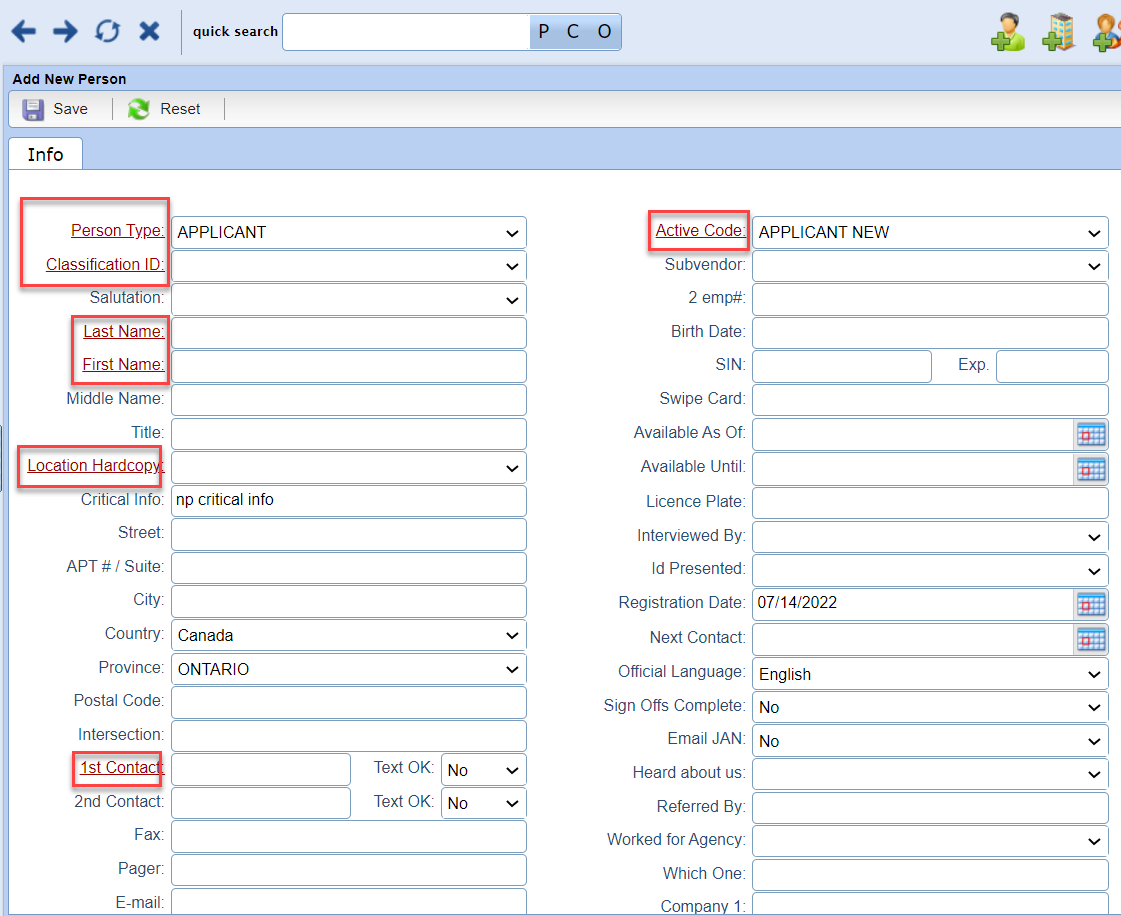
Essential fields which are recommended to enter to get the most out of Stafftrak are: |
|
|
|
|
4 |
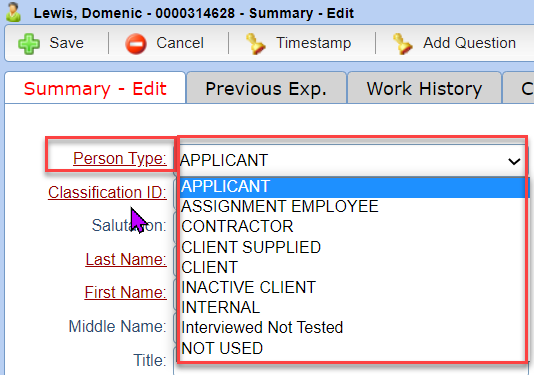
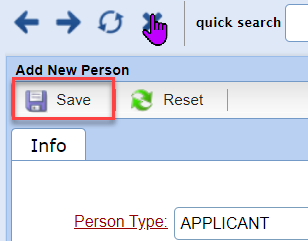
Once you’ve completed your data entry, select the Save button. Note the Person Type defaults to Applicant. Choose the necessary Person Type, i.e. Assignment Employee, Contractor, etc. |
|
|
|
|
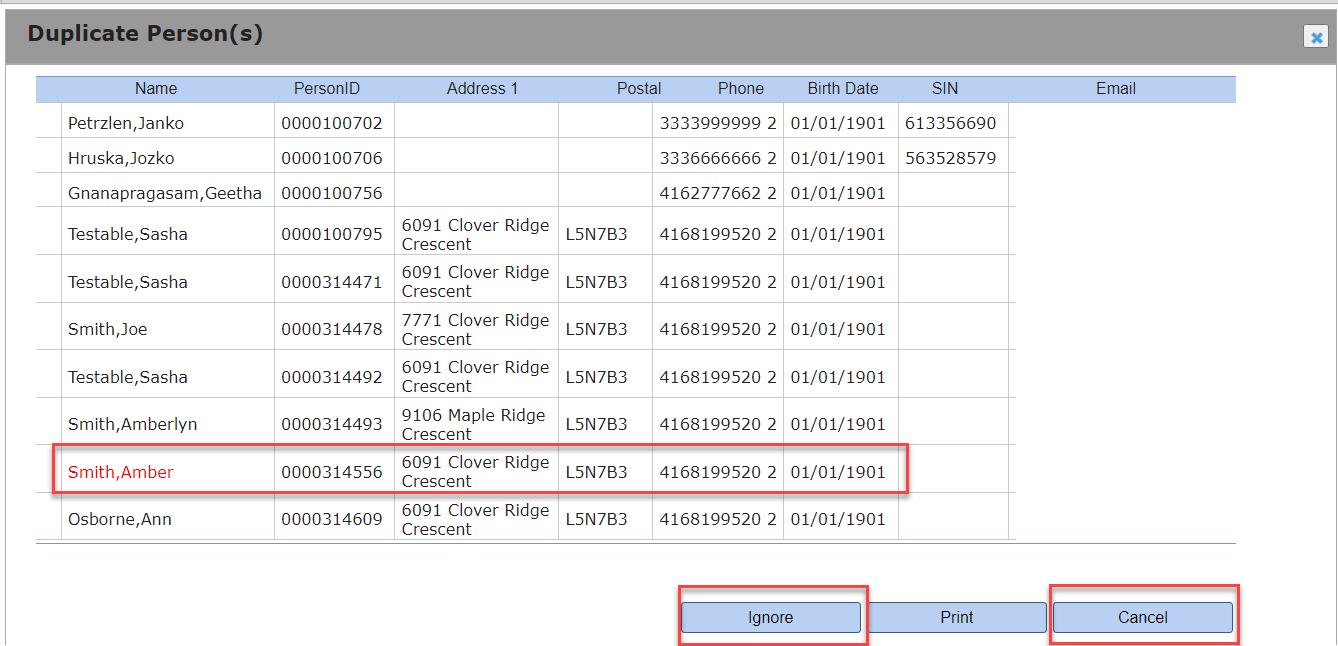
5 |
Stafftrak checks key fields for duplicates and if there is a duplicate, you will see the Duplicate Person(s) screen. To proceed, select Cancel if this is indeed a duplicate (no new entry will happen). If this is not a duplicate, select Ignore to continue adding the new Person (the new entry will happen). |
|
|
|


|
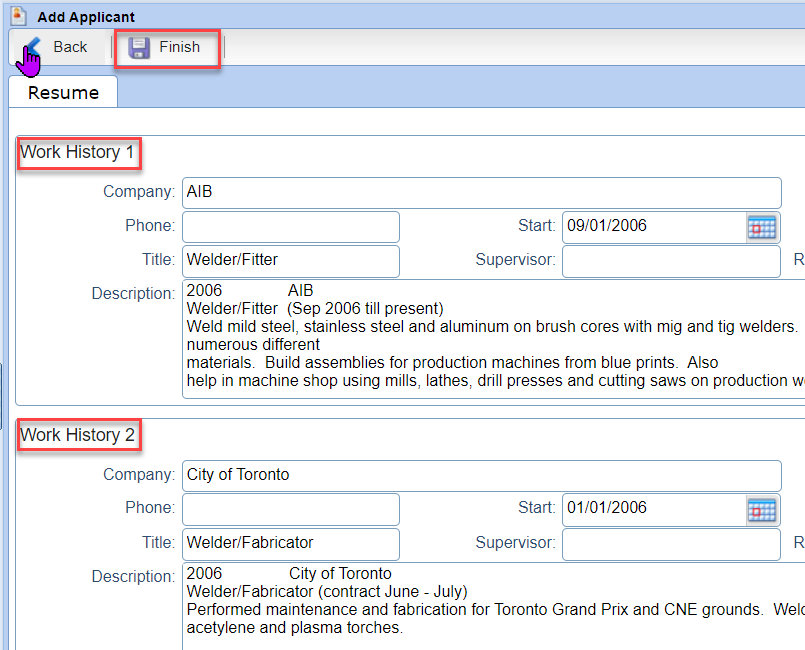
6 |
Review the Work History information, modify as necessary and select Finish when complete. |
|
|
|
|
7 |
Stafftrak checks key fields for duplicates and if there is a duplicate, you will see the Duplicate Person(s) screen. To proceed, select Cancel if this is indeed a duplicate (no new entry will happen). If this is not a duplicate, select Ignore to continue adding the new Person (the new entry will happen). |
|
|
|
|
8 |
The parsed Resume is added to the Documents section of the Person file. |
|
|
|

EMAIL RESUME PARSER |
|
|
1 |
Before using this feature, be sure Client Services has set up your email for this purpose. |
|
2 |
Send an email with the Resume attached file to the email below. |
|
3 |
Note: You may prefer to send Resumes to an internal email address such as jobs@youremail.com or resumes@youremail.com. By setting up a forwarding rule on those email accounts to forward the resume file to parsing@staffedge.com, it will be simple for your internal folks to know what email to use. |
|
4 |
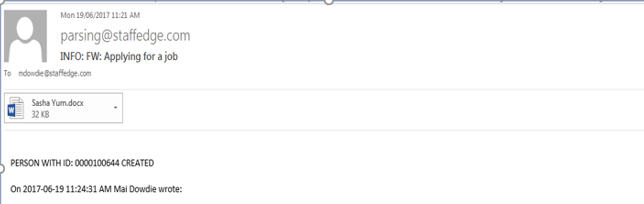
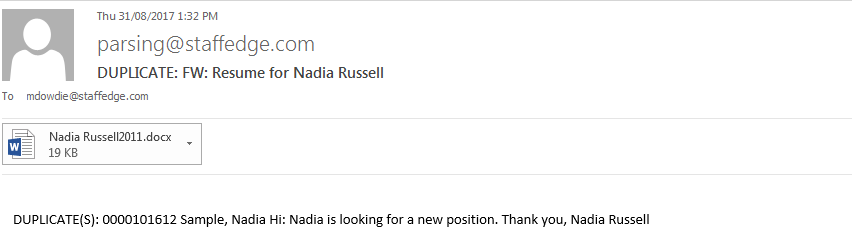
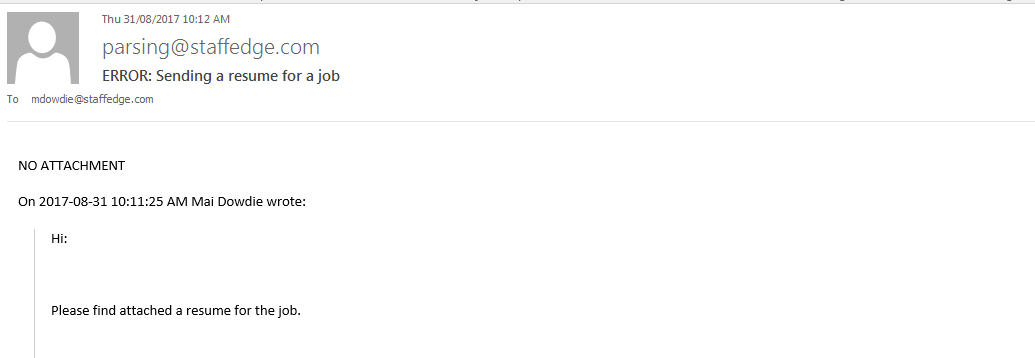
Once the email is sent, one of three things will happen. |
|
|
|
|
|
|