
onTIMEedge Mobile Instructions
onTIMEedge Mobile is an app that will allow you to enter and submit your hours of work for approval using any online device. You can download the onTIMEedge Mobile App on the App Store for IOS systems and the Play Store for Android.
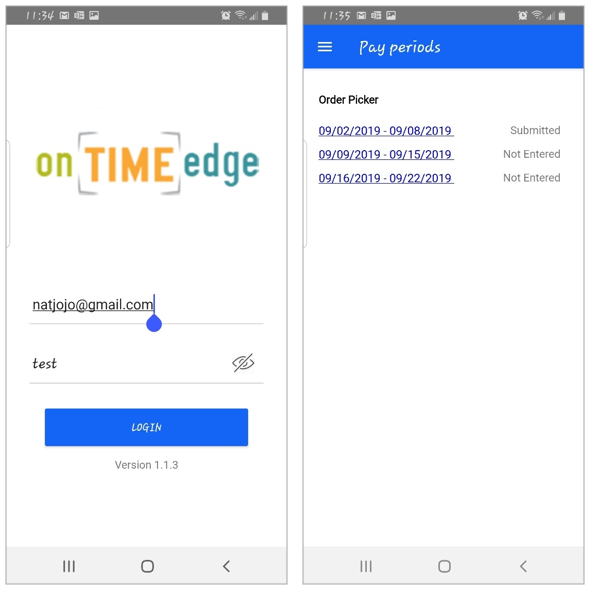
Once your account has been set up you will receive an email with your login information.
Log into your account using your email address and password. You will be taken directly to the Pay Periods screen where you will see any recent timesheets and the status of either Not Entered, Saved or Submitted.
Not Entered: No changes have been made to the timesheet, enter your hours and save or submit for approval
Saved: Some changes may have been made to the timesheet and saved, you can still make further changes before submitting for approval
Submitted: You have already submitted these hours for approval and will no longer have access to make changes
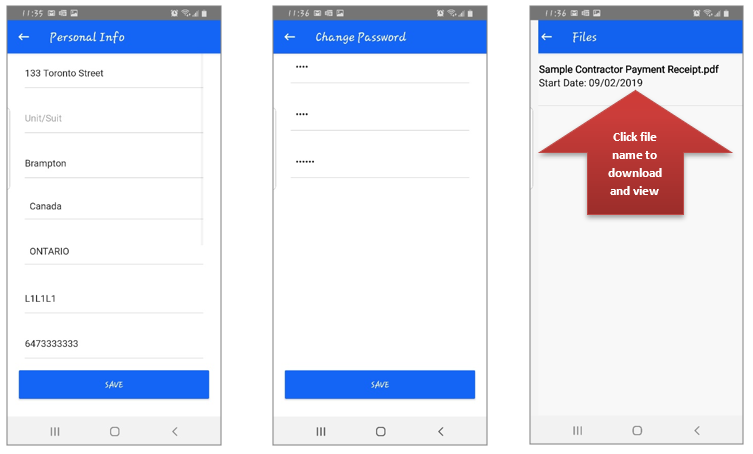
onTIMEedge can also be used to send updated contact information to the Staffing Firm that you are working for which will help ensure you file is always has your most current information.
Step 1 – Enter your hours
Select the Pay period you want to enter/update by clicking directly on the link.
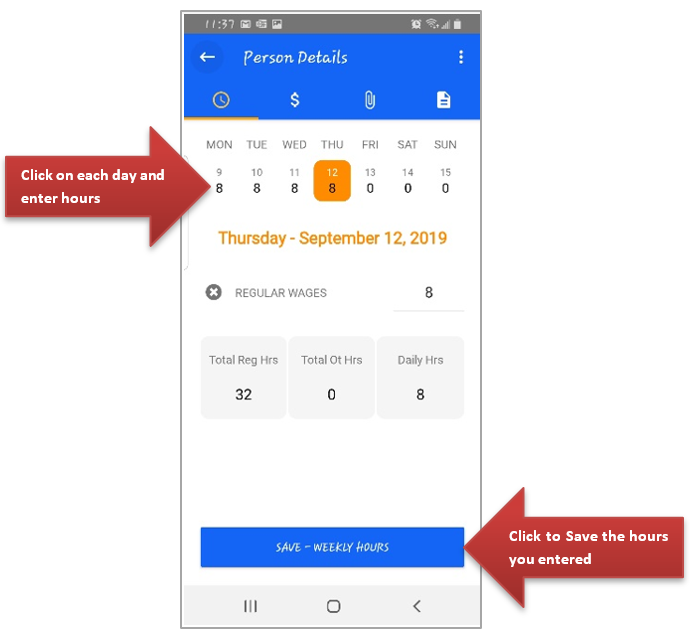
Enter the hours you worked. Do not enter hours for Statutory holidays unless you physically worked on the holiday. Click Save to ensure your changes will be captured.
If you don’t have any additional pay, expenses or attachments to add, skip to Step 5 in these instructions.
Step 2 – Adding additional timesheet lines
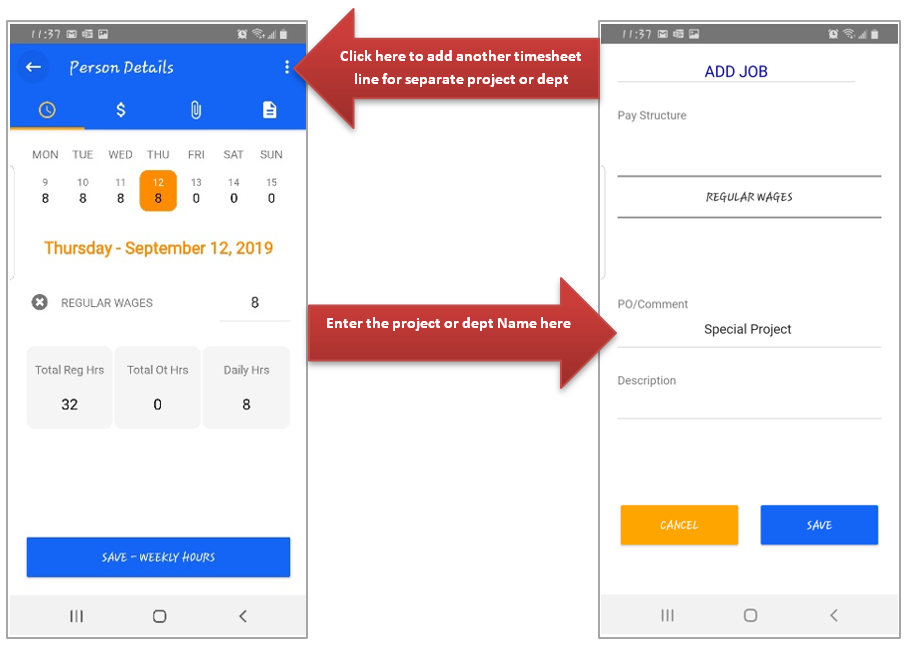
You can add additional timesheet lines if you want to document additional work hours. For example, if you worked in multiple departments or on multiple projects that require you to document your hours for each separately.
Click the 3 dots in the top right corner. On the next screen select the Pay Structure, enter the Project name and Description and click Save.
Click on the day you want to add the hours to and then click on the blank field to the right of your project/dept.
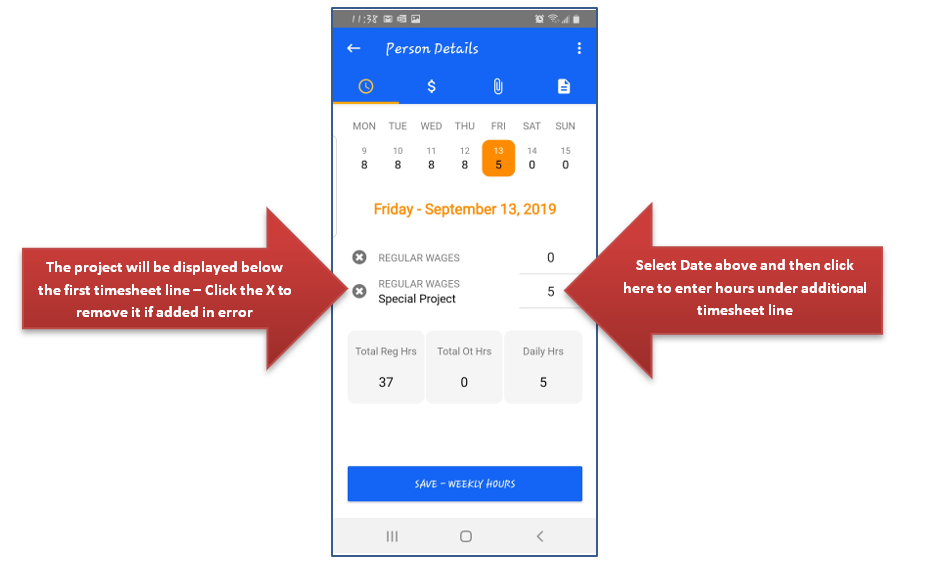
Remember to click Save. If you have nothing else to enter, please skip ahead to Step 5 to submit your hours.
Step 3 – Add Other Pay or Expenses
If you have other payments due to you such as expenses, you will find them under the $ Icon.
Enter the amount of your expense and click Save.
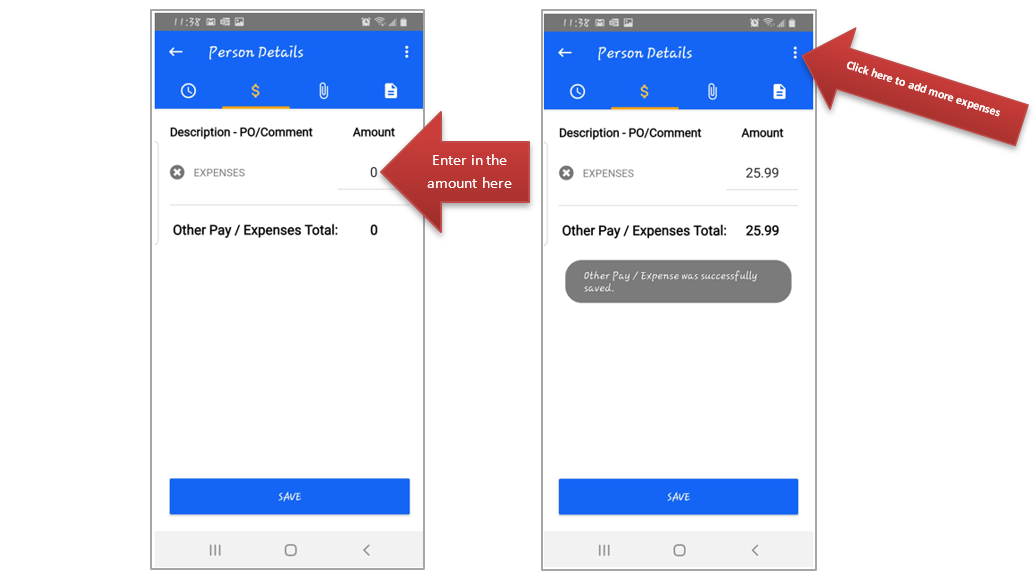
If you have multiple items, you can add more by clicking the 3 dots in the top right corner of the screen.
On the next screen select the Pay option from the list available (if applicable), enter a name and a description for the expense to help identify what the expense was for and click Save.
You will see the new line has been added. Enter the amount of the expense and click Save.
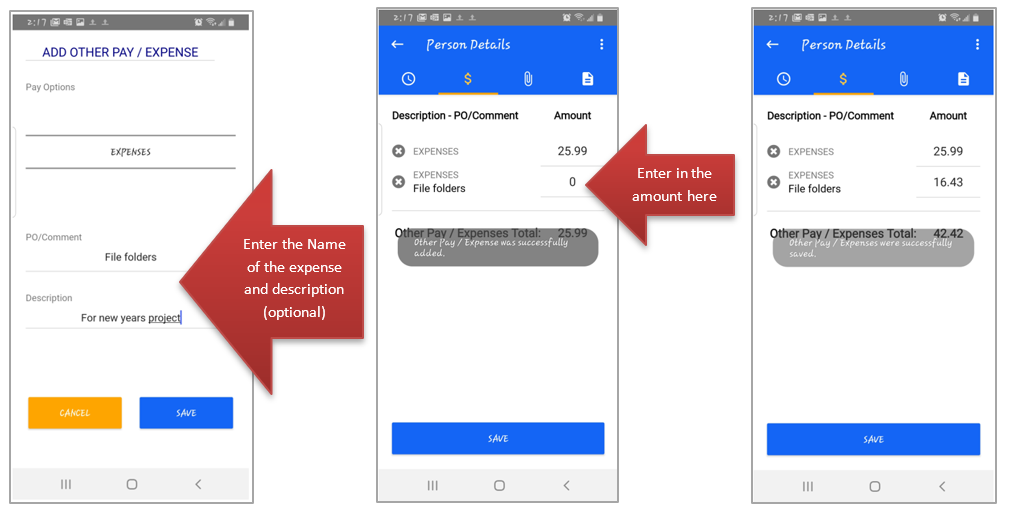
Remember to upload a copy of your receipts for all expenses added. If you did not add an expense and/or have no documents to upload, skip ahead to Step 5.
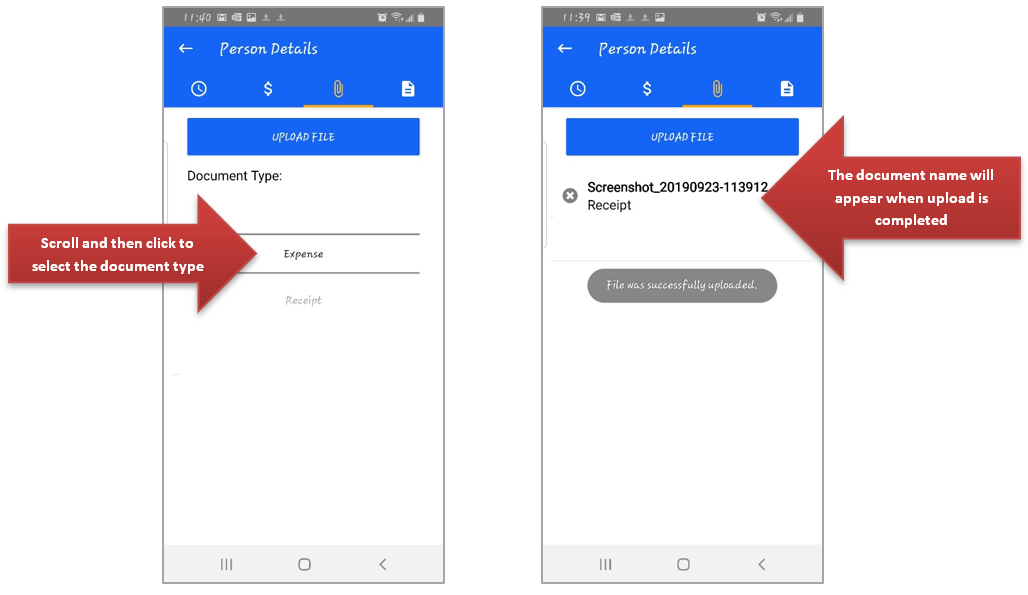
Step 4 – Upload a Document
You can attach documents to be sent with your timesheet for approval. This could be used for items such as copies of receipts or expense reports. To attach a file, click the paper clip Icon, select the Document Type by scrolling through the menu and then click on the type that you want to upload. Find where the item is saved on your device to add it. This could take several seconds, please wait for the confirmation message and file name to appear to confirm your document is uploaded.
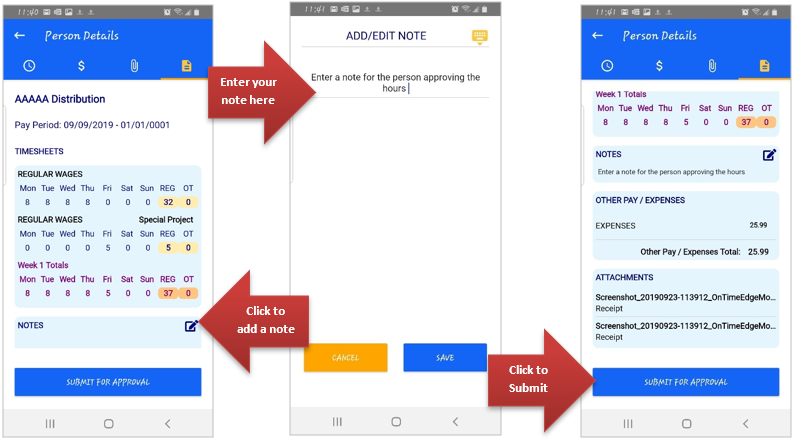
Step 5 – Review and Submit
Once you have completed entering your hours, go to the Paper Icon on the far right. This is where you will review the items you have entered and submit your timesheet for approval. On this screen you can add a note for the person who is approving the hours to see. Click on the pencil to add a new Note. Click Submit for Approval once you are certain everything is correct. Once submitted you will no longer be able to make any changes to this timesheet.
Added features
Click on the Menu (3 bars) in the top left corner to access additional features such as updating your personal contact information or changing your password. You will also find a link to all files you have uploaded to onTIMEedge and a history of timesheets for the last 3 months.
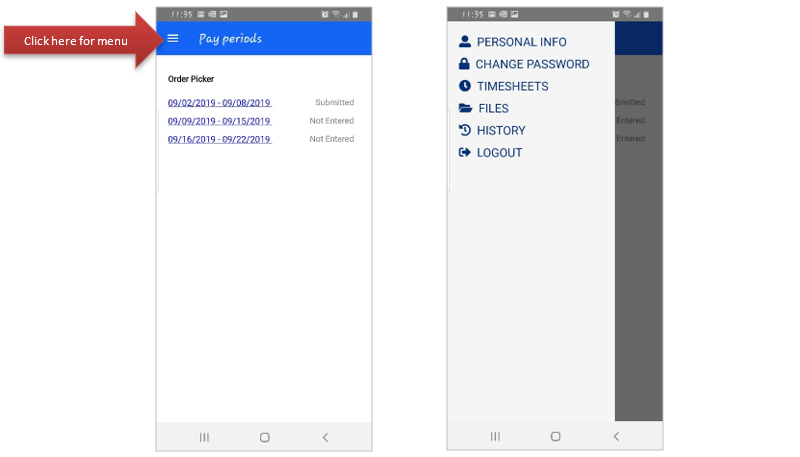
Once you are done using onTIMEedge Mobile, click Logout on the Menu.