
onTIMEedge Full Instructions
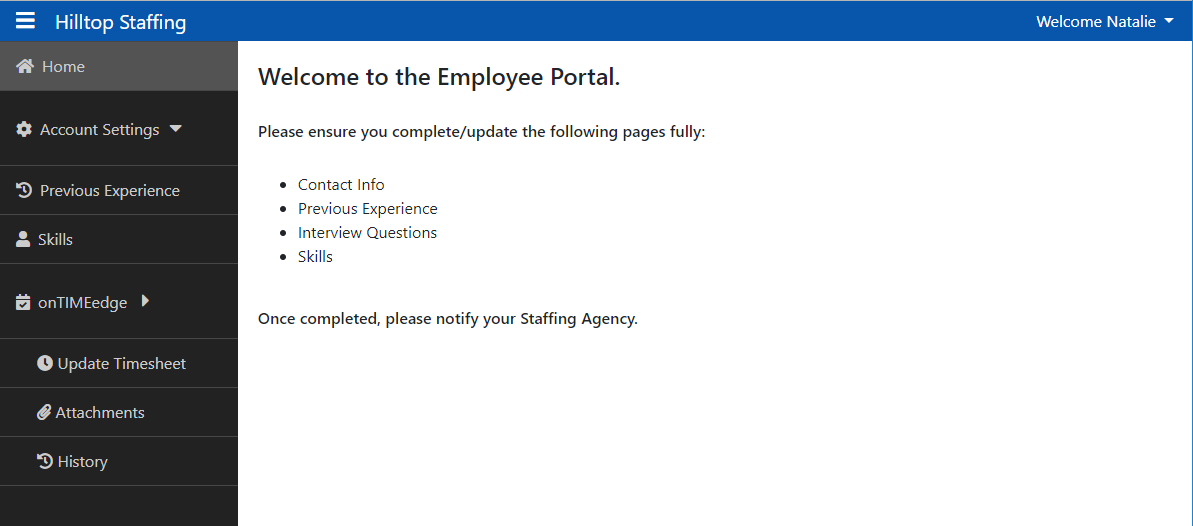
Once your account has been set up you will receive an email with information on how to log into onTIMEedge. Log into your account using your email address and password. onTIMEedge is housed on the Employee Portal site where you can also update your personal information.
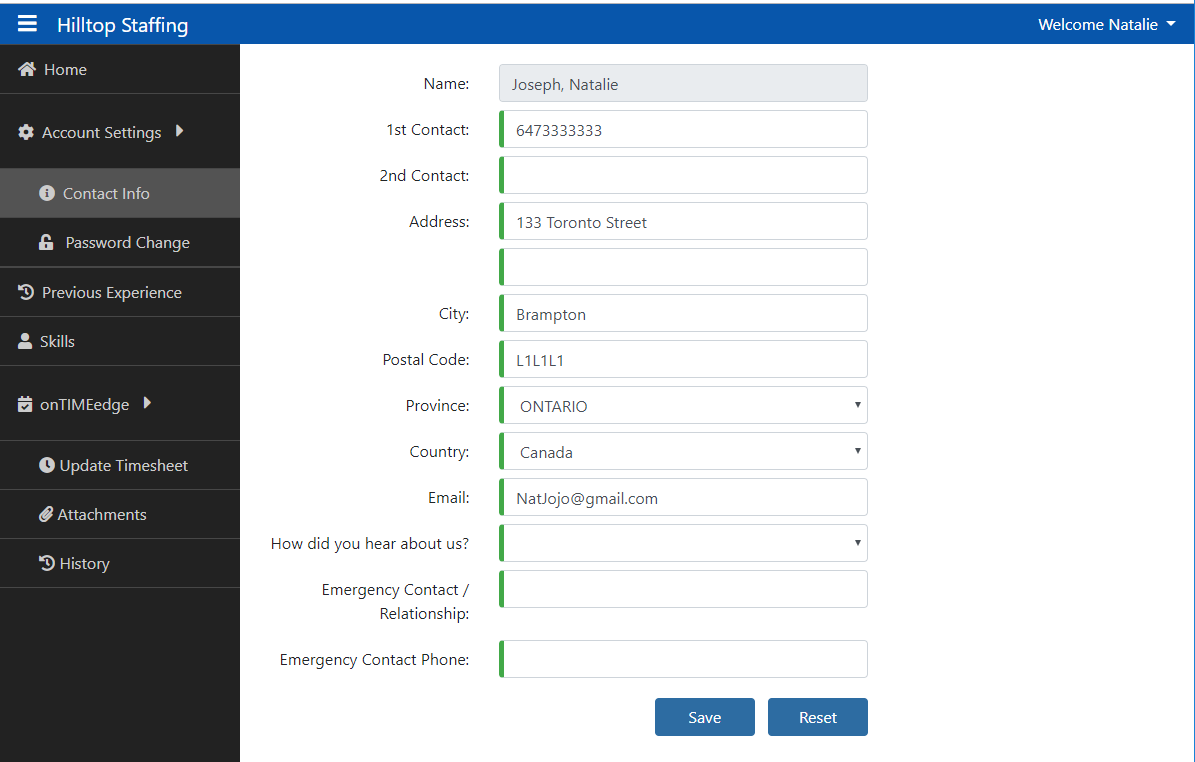
Account Settings
Click on this header to update your Contact info such as phone number, email or address. (It is crucial that you make these changes before you submit your timesheet)
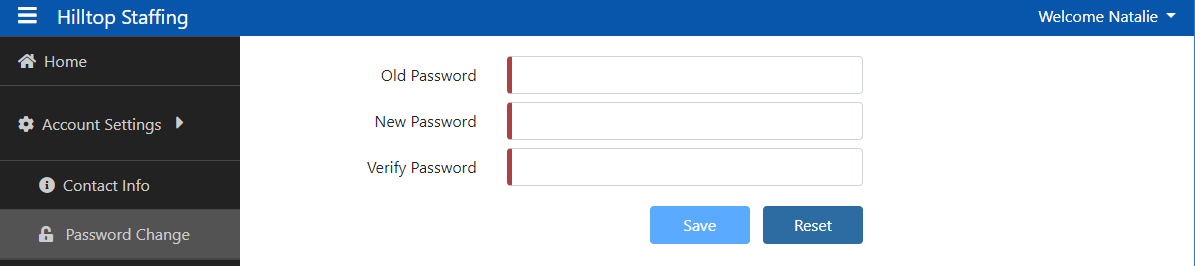
Password Change: Enter the old password, New password and then the new password again to verify the change then click save. A green box will pop up letting you know the new password has been changed successfully. If the New password and verify password do not match a Red box will pop up to let you know so you can re-enter and try again.
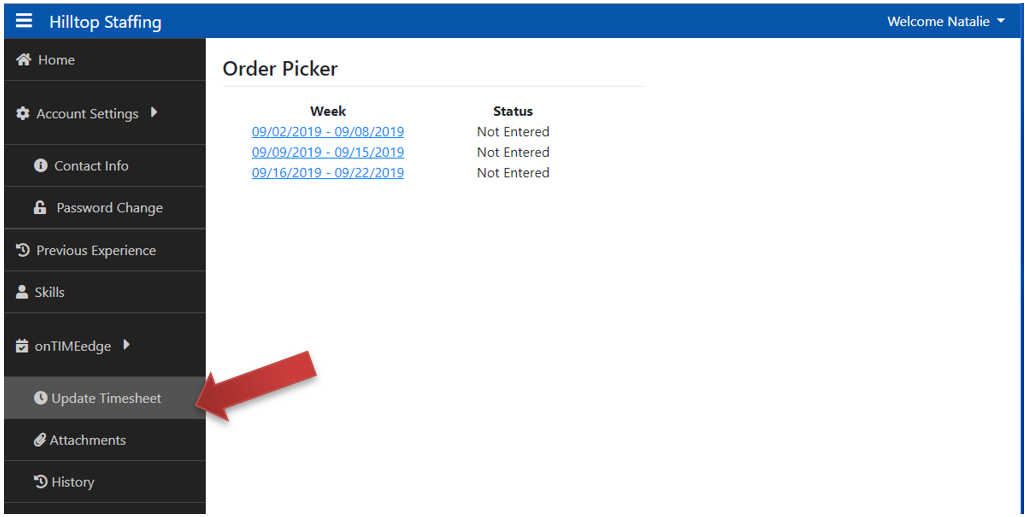
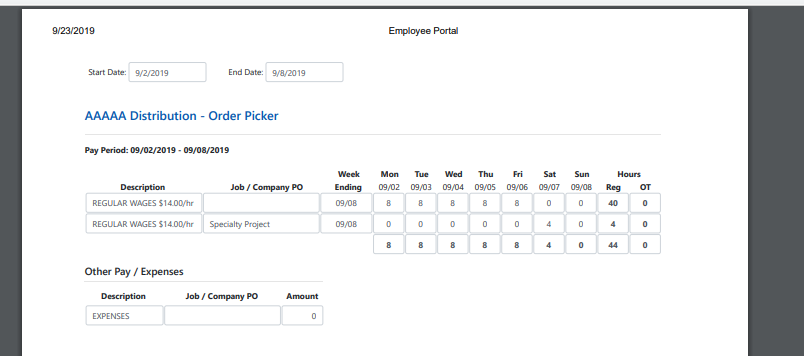
Update Timesheet
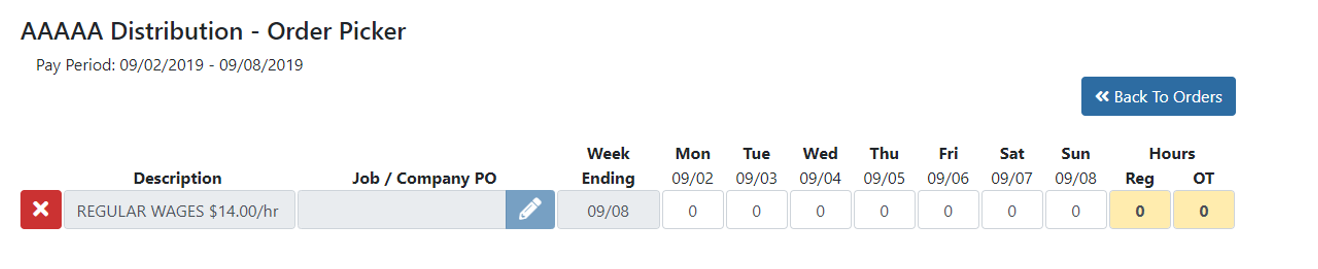
This is where you will add the hours you worked and submit for approval.
Click Update Time sheet and then Click on the week ending you wish to update.
Enter the hours you worked. Do not enter hours for Statutory holidays unless you physically worked on the holiday.
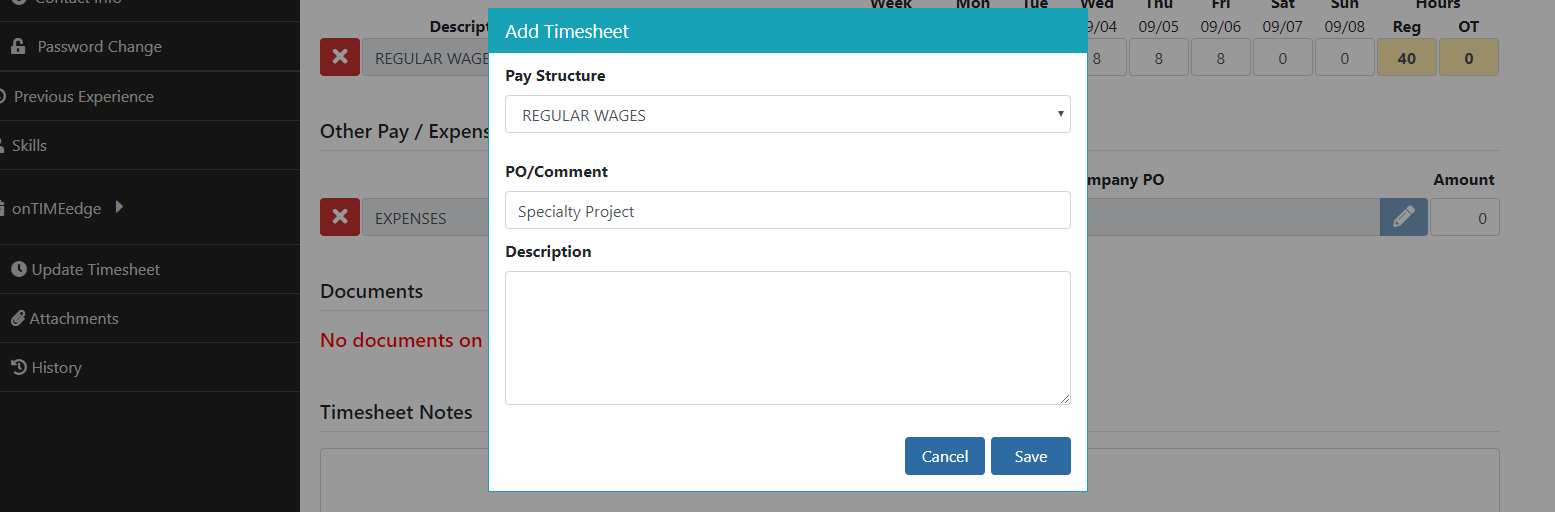
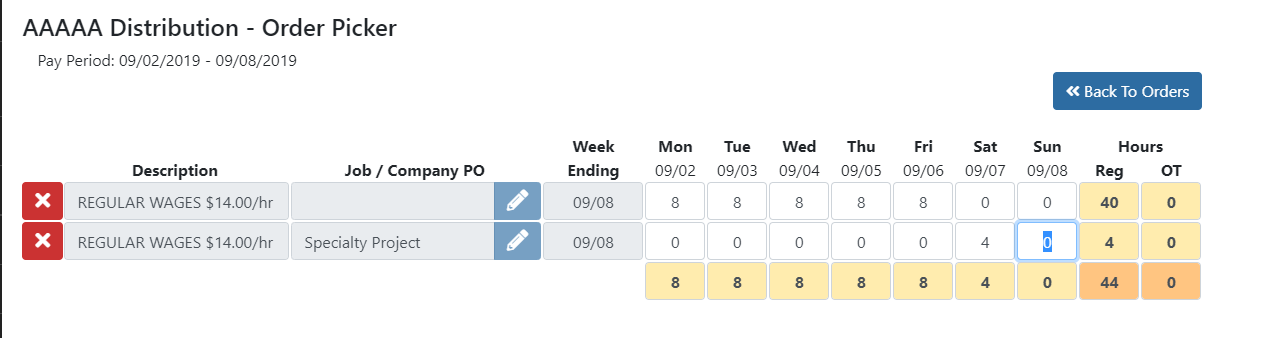
You can add additional timesheet lines if you want to document additional work hours. For example, if you worked in multiple departments or on multiple projects that require you to document your hours for each separately.
Click Add Time sheet. In the new box that pops up enter the Project name and Description and click save.
Enter the hours in your new timesheet line
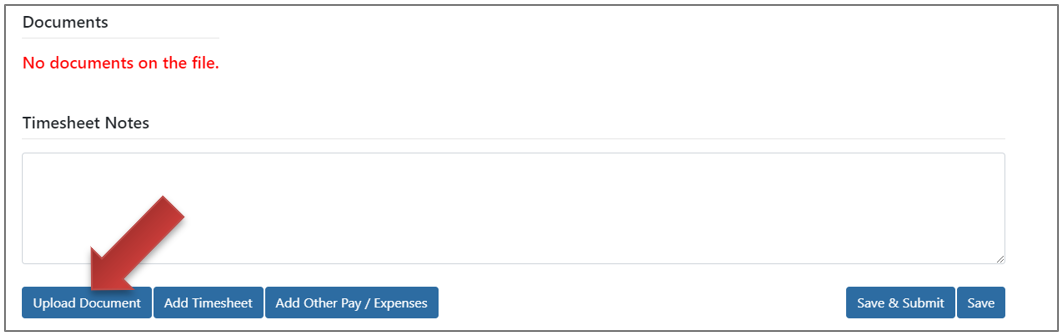
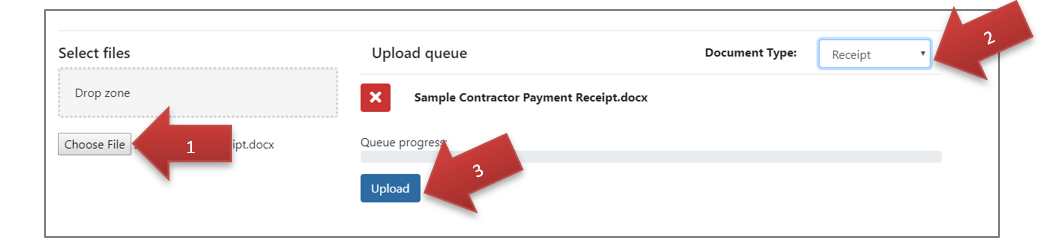
Upload a Document
You can attach documents to be sent with your timesheet for approval. This could be used for items such as copies of receipts or expense reports.
To attach a file, click the Upload Document Icon
Click Choose File to search and select the document, pick a Document type off the drop down menu and click Upload
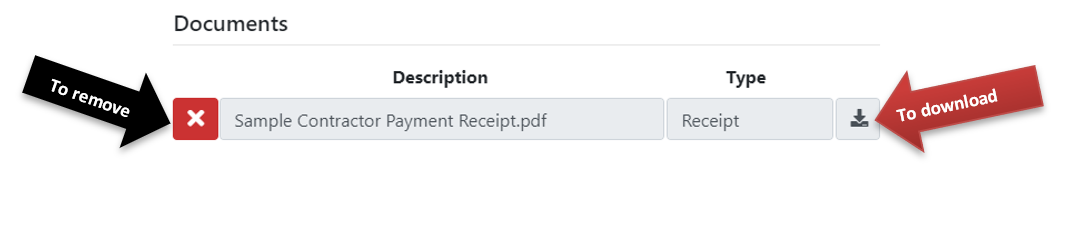
You will see the fill has been added under documents. To remove the file, click on the X in the red box on the left of the document name. To download the document again click the arrow on the right side of the Type.
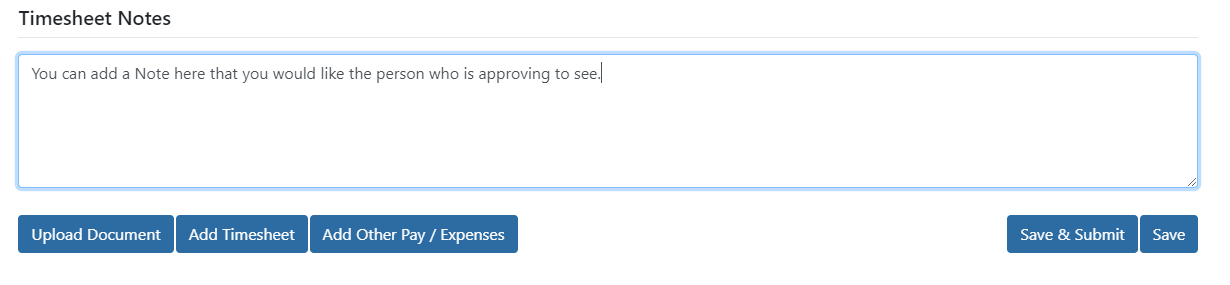
Add a Note
You can add a note for the person who is approving the hours to see.
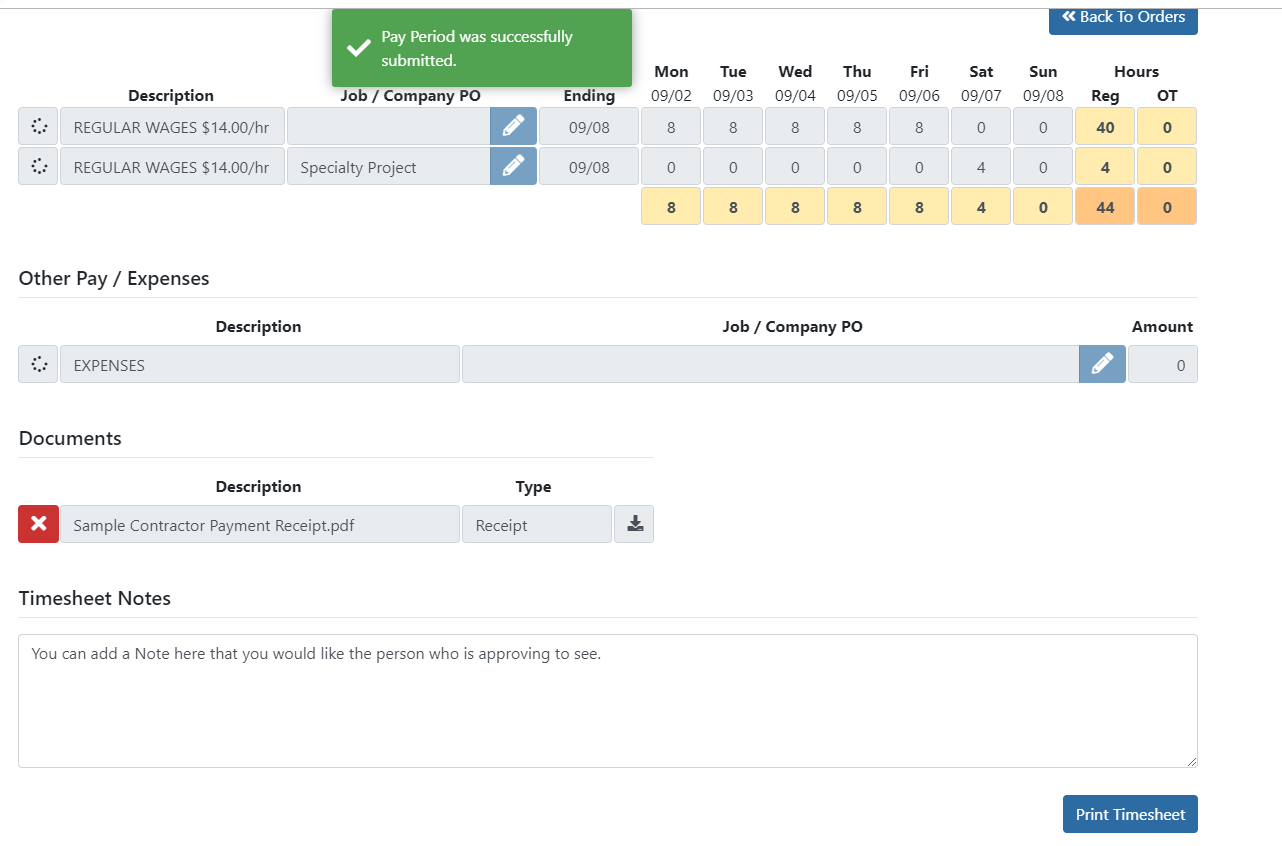
Submit your hours
Once you have entered all hours for a pay period and are certain everything is correct you must submit the hours to be approved and processed so that you can get paid. Remember to ensure you meet the payroll submission deadline set out by your employer. Once you click Save and Submit, you will no longer have access to make changes to the time sheet. If you prefer to just save your work and return later to submit your timesheet, click Save.

You will receive a pop up indicating your hours have been submitted successfully.
You can print a copy of your submitted timesheet by clicking the Print Timesheet button.
History
A History of all your Timesheets submitted will be available for you to view or print at any time.
Click on History and enter search dates to find the timesheets you’d like to view

You can print a copy of the History you have viewed by clicking the Print Icon at the top of the page
Once you are done using onTiMEedge, click Logout in the top right corner of your screen.